In general most of the Hierarchies are extracted from source system but in some cases there could be combination of multiple items which cannot be incorporated at source system level. That requires creating the Hierarchy in BI directly. The BI system allows you to create manually but if there is going to be changes quiet often and if it is bigger , better to prepare the Hierarchy and upload it to BI system.
Let us learn how to upload a simple hierarchy into BI system and the layout remains depending up on the definition of the Info Object with the option you choose while defining the Object.
For our understanding we will take the PLANT Object as an example to understand the flow.
Define the object or pick the existing object. Here am going to take an custom object YPLANT which is copy of 0PLANT. The definition of the object is like below. Here the option is Hierarchy elements can be reassigned to different nodes with dates .

The file structure should have all the objects from the screen below or few depending on the


Now we need to create Data Source. For this choose Data Source option from Workbench and navigate to PC file option. From this create Data Source for File and fill as required.
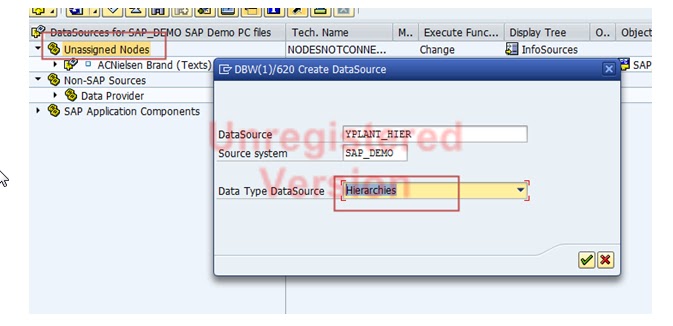

Choose Extraction Tab give file location where you are going to keep the file and fill as follows and choose header option as shown. If you dont know just give some name can be changed later.

The Header option give the file structure for preparing the CSV file . Fill on the POP UP screen as follows and choose save option.

On the next screen choose File Structure Tab ans you will the structure generated by system.
Toshiba Satellite L875D-S7332 Notebook Laptop (Google Affiliate Ad)

In Segments Fields Tab, we
can see the different segments. Hierarchy Header is the primary segment. The
screenshot of ‘Hierarchy Header’ is given below:


Activate the Data Source.
The file layout should look like this and save with CSV format to the location specified above and name.

For remaining PART
No comments:
Post a Comment