PART I-- Hierarchy Load
Continuing with PART 1 , in this part we will see the further steps for loading the data , Transformation etc
First insert the Info Object YPLANT as Info Provider under Infoprovider Tab from Workbench.

Once the Object is inserted , then we need to create Transformation to this from the Datasource created in PART 1.

Add the required info on the following screen.

Samsung 16GB Galaxy Tab 2 Wi-Fi Tablet - GT-P5113TSYXAR (Google Affiliate Ad)
Map the objects as below for each set of segments.
Here, make sure that you
map ‘NODENAME’ field to ‘ZPLANT’ infoobject .If you are maintaining data for
any other external characteristics in the flat file ,then make sure that you map
‘NODENAME’ to them as well.
Once Mapped all the required ACTIVATE the Transformation.


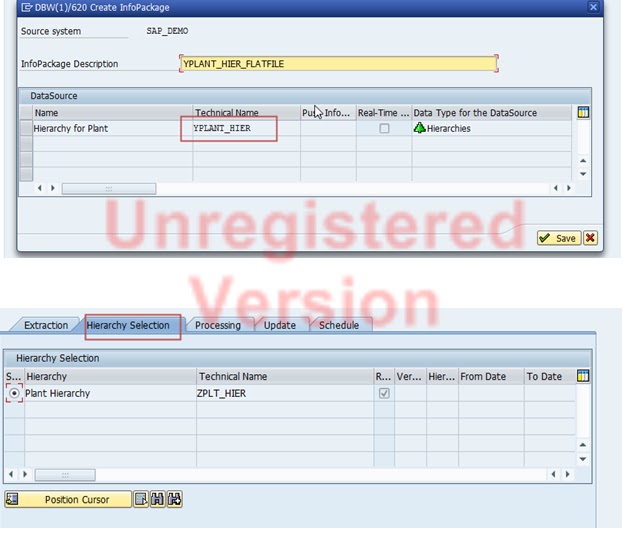
Create Infopackage and DTP as Well. For DTP select as follows.
For Info package dont forget the choose your Hierarchy option.

Google Nexus 7 32GB Tablet (Google Affiliate Ad)
Execute the Info package after checking extraction part of the tab and you can now check PSA by going to the Monitor .

You can see the set of records by segment by choosing relevant option like above.
The contents of PSA..

Google Nexus 7 32GB Tablet (Google Affiliate Ad)
Then execute the DTP and you should be good to go.
The Hierarchy can be viewed from TCODE RSH1.

Once you select the Hierarchy and choose display option from Tool Bar.
Here is the output

No comments:
Post a Comment